October 13, 2026 • 8 Min Read

How to create product-in-hand photos and ads with AI

Alex Chen, Member of Technical Staff
How to create product-in-hand photos and ads with AI
Alex Chen, Member of Technical Staff

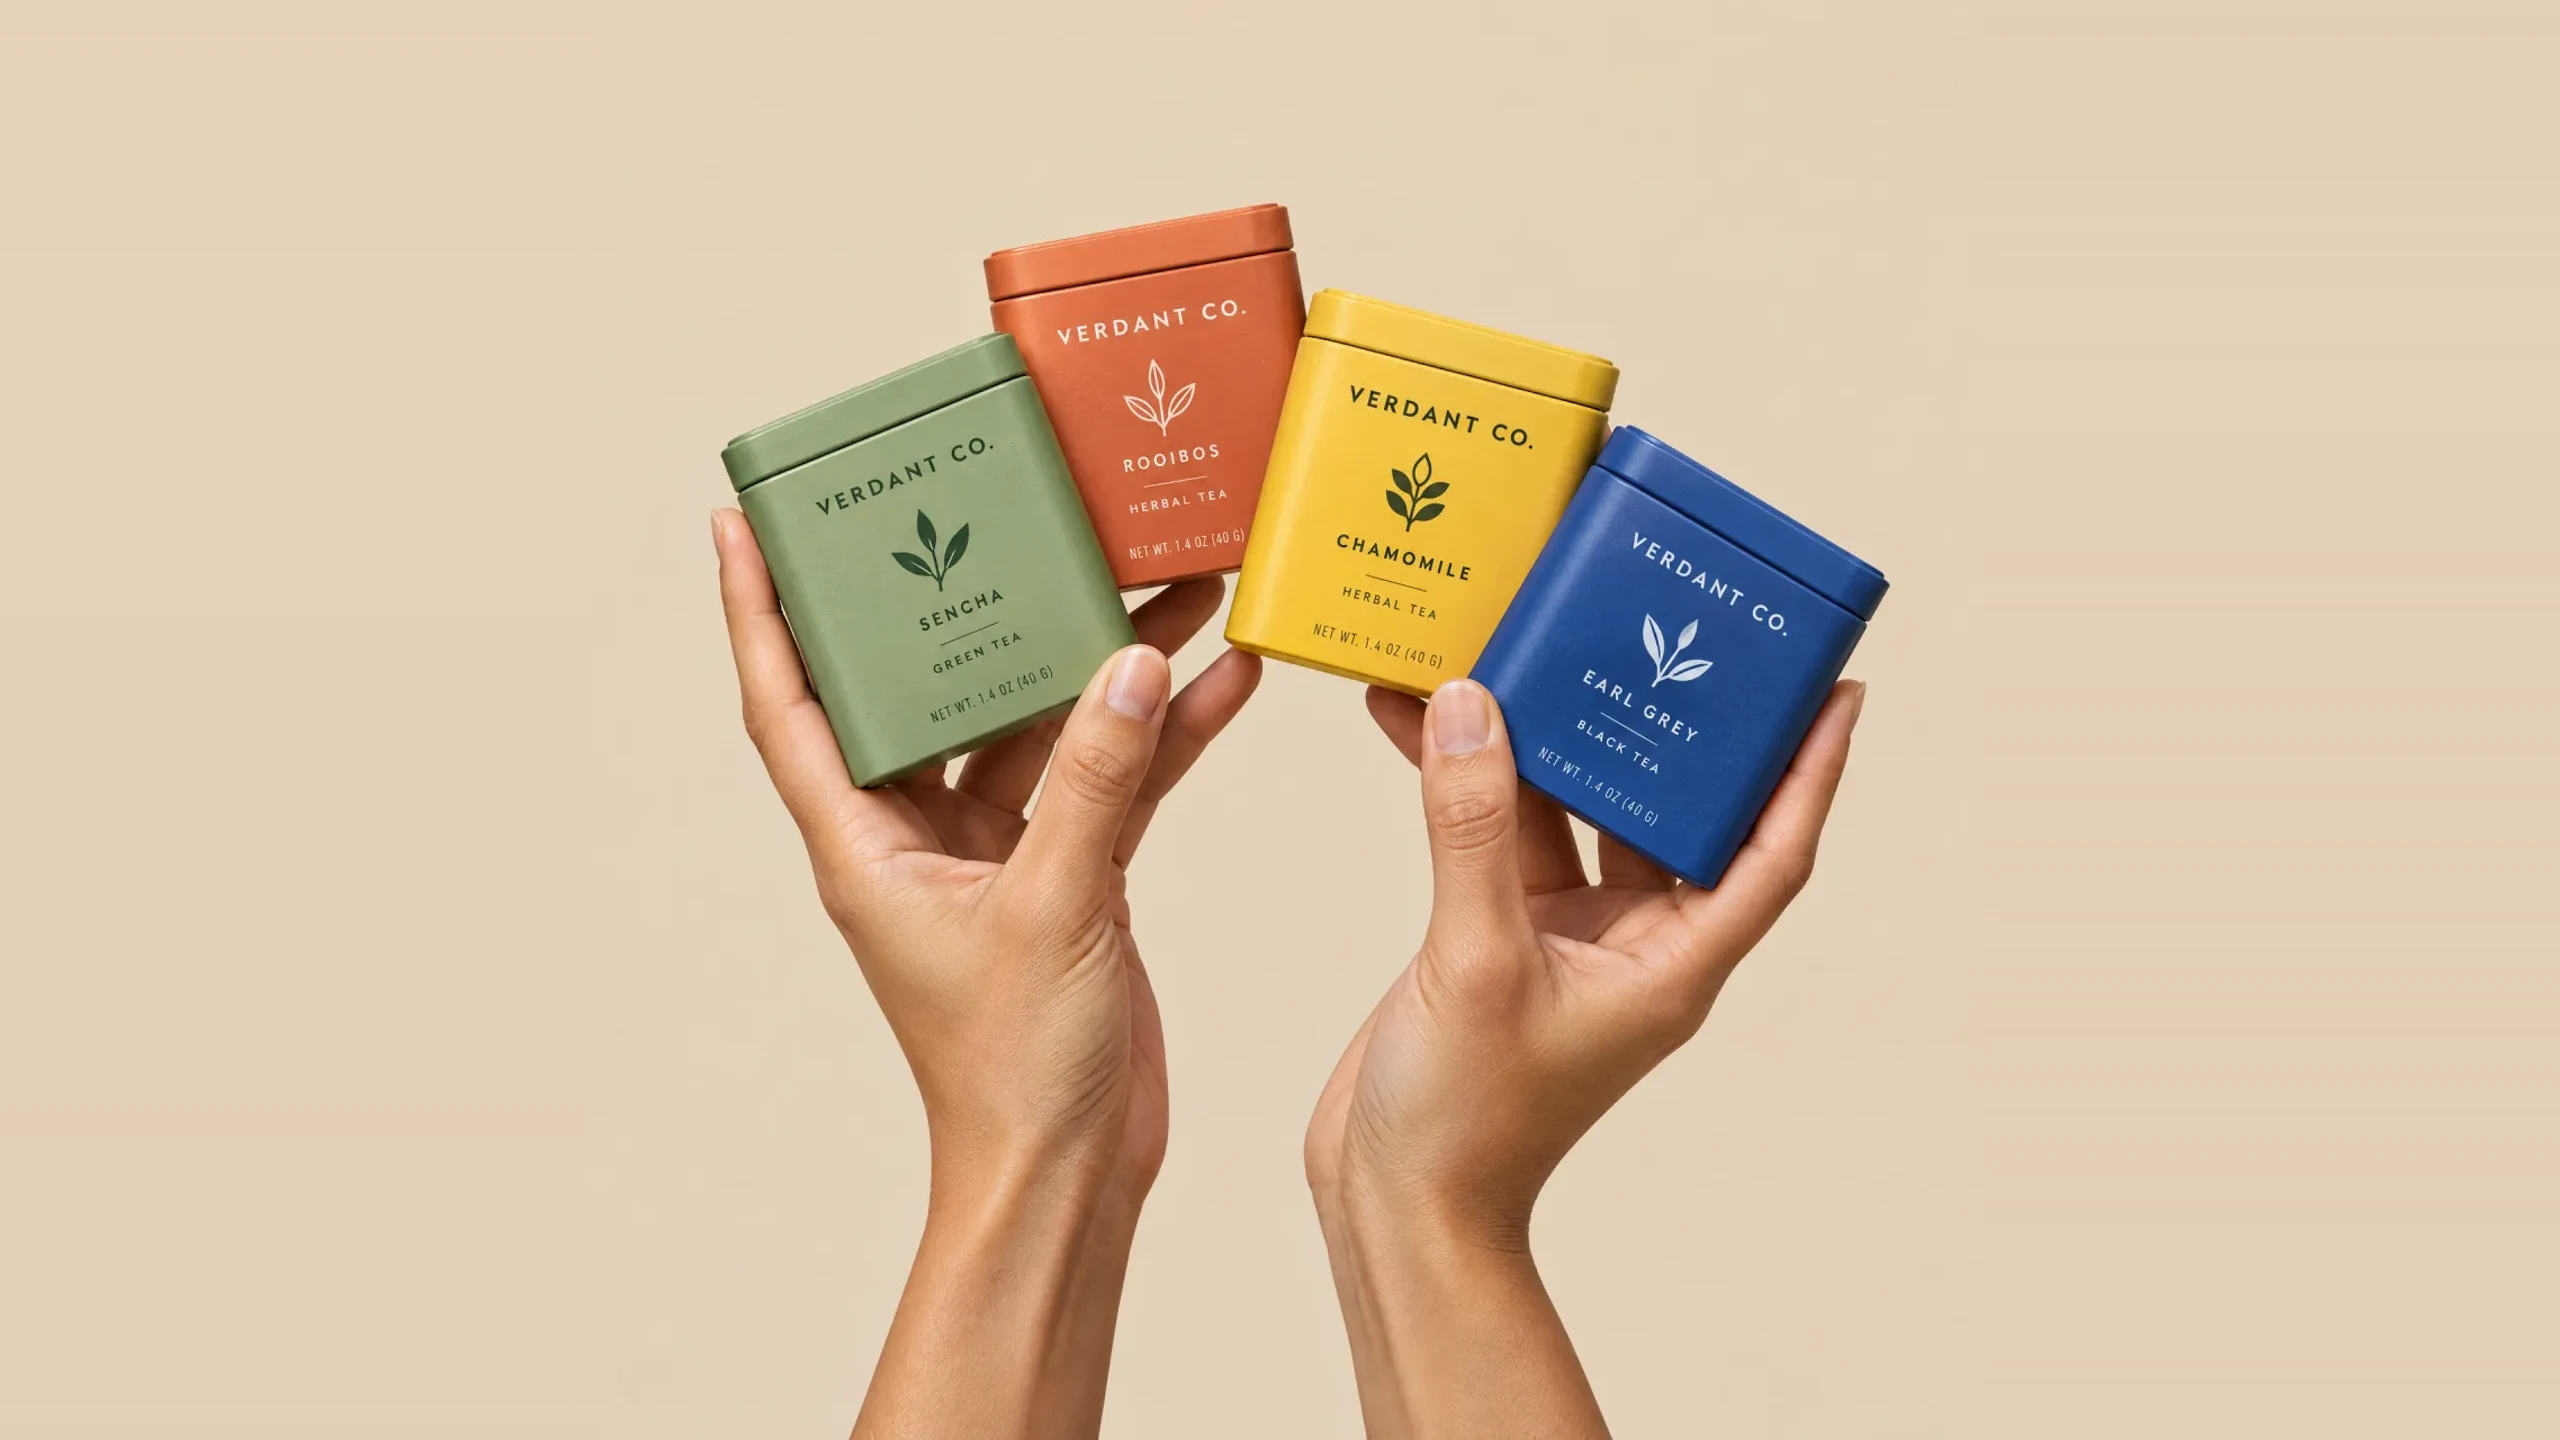
To create a product-in-hand photo with AI, you give an image model a clean photo of your product and either describe the hand that should hold it or supply a real photo of a hand. The model composites the two into one shot. On Melius, that's an image-to-image node with your pack shot as the image input and your product details as context, or a product swap that drops your item into an existing hand photo.

The reason brands bother is scale. In Baymard Institute's product page usability research, 42% of users try to gauge a product's overall size from its images, and 28% of the 60 major e-commerce sites it benchmarked offered no in-scale images, even for their best-selling products. A hand is the most familiar ruler there is. It also makes a product look used and handled, which is why the format shows up so often in social ads for cosmetics, supplements, phone accessories and drinks.

Key takeaways

  • There are two ways to get a product into a hand. Generate the hand around your pack shot, or swap your product into a real photo of someone holding something.
  • Start from the real product. Start from a clean pack shot and the product page details, so the model copies your packaging instead of inventing a near match.
  • Hands fail in predictable places: extra or merged fingers, a grip that doesn't touch the product, the wrong scale. Run several variations, then inpaint the hand instead of regenerating the whole frame.
  • Labels and logos get their own handling. Add the logo as a separate reference and switch to a model that holds text, so the branding reads the same in every shot.
  • A still becomes an ad with one more node. Feed the finished photo into a video node for a slow hold-and-breathe motion, and keep the label fixed while the hands move.

Why AI hands go wrong

Image models draw a hand from flat 2D patterns, with no model of the joints underneath. Peter Bentley, a computer scientist at University College London, put it this way to BBC Science Focus: these generators have no concept of the three-dimensional geometry of a hand. Holding something is the hard case, because the fingers have to wrap an object the model is also drawing, at the right size, with contact that looks like weight.

Product shots add a second failure on top. A model that redraws your bottle from a vague prompt will get the proportions or the label slightly wrong, and slightly wrong is the version a customer notices when the package arrives. The workflow below deals with the product first and the hand second.

Method 1: generate the hand around your pack shot

Use this when you don't have a model or a hand photo, and you want to set the scene, the skin tone and the grip yourself.

  1. Drop the pack shot on the canvas. Use a clean product photo on a plain background, ideally with a few angles grouped together. This is the input every generation copies from.
  2. Pull in the product details. Paste the product page URL into the agent chat and ask Mel, the Melius agent, to pull the dimensions, materials and color into a text node. Without real dimensions, the model guesses proportions wrong roughly half the time.
  3. Create an image-to-image node. Use Nano Banana Pro, our pick for product-in-context shots and skin tone, at 2K. Connect the pack shot to the image input and the product details to a context input.
  4. Describe the hand and the grip. Be as specific about the hand as you are about the product: "A woman's hand with short natural nails holds @product at chest height, thumb on the front left edge, four fingers wrapped behind, soft window light from the left. Use the exact product from the reference. Don't restyle it, recolor it, or change its shape or proportions. Use @pdp-details for accurate dimensions."
  5. Run several variations at once. One node can run up to 10 variations in parallel. Three or four is enough to find one where the grip and the fingers are right.
  6. Inpaint the hand. If one take is right except for a finger, open it full-screen, use Inpaint to mask the hand, and describe the fix. Everything outside the mask stays as it was.

Method 2: swap your product into a real hand photo

Use this when the hand matters most: a model you've already shot, a creator holding a placeholder, or a stock photo with the grip you want. It follows the product swap workflow in our product photo variants guide.

  1. Upload the hand photo. Pick one where the person holds an object close to your product's size and shape. A phone-sized object for a phone case, a bottle for a bottle.
  2. Add your pack shot. Same as Method 1: a clean photo of the real product.
  3. Wire the swap. On an image-to-image node, the hand photo goes to the image input and the product goes to a context input. Match the node's aspect ratio to the original photo.
  4. Prompt for the replacement. "Replace the bottle in @scene with @product from the reference image. Keep everything else identical: same hand, same lighting, same color grade, same camera angle. Match the placement, scale and orientation of the original bottle."
  5. Adjust scale in words. If the product comes back too small or too large, keep the rest of the prompt and add one line, such as "the product should be 20% larger". Once swaps become routine, start from the Product Swapper template, which pre-configures this flow.

Keeping the label, logo and color accurate

  • Always include the pack shot. A lifestyle photo of the product is a weaker reference than the clean pack shot. Give the model the clearest view of the thing it has to copy.
  • Give the logo its own node. Upload the logo file separately and tell the prompt to use it exactly rather than redraw it. A model draws an approximation of anything it isn't given.
  • Switch models for visible text. Image models differ most on typography, so for packaging with legible labels, pick one that's strong at rendering text. Our model guide lists which. If a logo still drifts, re-run that node at a higher quality setting.
  • Generate at 2K or higher. Fine print and embossed marks need the resolution during generation, because upscaling later can't recover detail that was never drawn. Judge sharpness in the full-screen view, since the canvas preview is downscaled.

Turning the photo into a product-in-hand video ad

A finished still can carry a short motion version for Reels, Stories and paid social. Wire it into a video node, keep the motion small, and say what stays fixed. Take a supplement bottle held in two hands: the brief keeps the text, logo and label in place and adds a slow breathing motion to the hands, as if the model is holding the bottle steady.

For a creator-style clip with talking and movement, the jump is bigger. Connect the pack shot to every video node where the product appears, because a video model left without the reference will invent a product that isn't yours.

How other AI tools handle product-in-hand shots

Several tools cover parts of this job, as of October 2026. Adobe Photoshop's Generative Fill edits a selected region from a prompt, which suits fixing a hand or adding one into an existing photo. ChatGPT Images accepts an uploaded photo and a description of the change, though OpenAI notes its selection tool isn't always precise and edits can spread past the highlighted area. GoStudio's Product Holding Generator takes a photo of a person and a photo of a product and composites them. AdMakeAI's Product in Hand Ad Generator takes up to three product images and returns a finished ad.

The difference is how much of the process you can see and change. A one-step generator returns a finished image, and a correction means another full run. On a canvas the pack shot, product details, logo, hand photo and prompt are separate nodes, so a wrong finger is an inpaint and a wrong label is a model switch on one node, with the rest of the shot left alone.

Why make product-in-hand shots on Melius

Melius is the AI-native operating system for creatives, built on a node-based canvas. Mel, the Melius agent, builds the workflow as nodes, so when one detail is off you fix that node instead of regenerating the shot.

Once one shot is right, the canvas is reusable. Duplicate it, swap in the next SKU's pack shot and details, and the hand, light and framing carry over. That is how a team gets 30 consistent product-in-hand images instead of 30 that each look a little different. Every step runs on one subscription across a library of leading models. The rest of the store workflow, from pack shots to listing copy, is on Melius for e-commerce.

You own the content you create on Melius and can use, publish, and distribute it commercially, subject to the underlying model providers' terms. Melius doesn't claim ownership of your work and doesn't use it to train AI models.

Have a pack shot and a product page? Open Melius, brief Mel with the hand you want, and run four variations on one SKU first. Open Melius.

Frequently asked questions

What is a product-in-hand photo?
A product-in-hand photo shows a product held in a person's hand, usually close up, so shoppers can judge its size and see it in use. It is common in e-commerce listings and social ads for products small enough to hold, such as cosmetics, supplements, drinks and accessories.
Can AI generate realistic hands holding a product?
Yes, with a reference and a correction step. Image models still produce extra or merged fingers and grips that don't touch the product, so the reliable approach is to run several variations, keep the best, and inpaint the hand if a finger is off. Swapping your product into a real hand photo avoids generating the hand at all.
Do I need a hand model or a photoshoot?
No, but a real hand photo helps. Method 1 generates the hand from a description, while Method 2 places your product into a photo of a real person holding something similar, which gives the most natural grip and skin.
Can I turn a product-in-hand photo into a video ad?
Yes. Connect the finished still to a video node and describe one small motion, such as the hands settling or the product tilting toward the light, while the label, logo and background stay fixed. Short clips like this suit Reels, Stories and paid social.
What resolution should product-in-hand photos be?
Generate at 2K or higher. Labels, skin texture and fingernails all need that detail, and the canvas preview is downscaled, so check the full-screen view before you download.

Related Articles